You are here: 10. Third Party Tools > 10.1. Denso Batch Scanner > 10.1.2. Using the Micronet Batch Scanner > 10.1.2.1. Stocktaking with the Micronet Batch Scanner > Micronet Stocktake Procedure
Micronet Stocktake Procedure

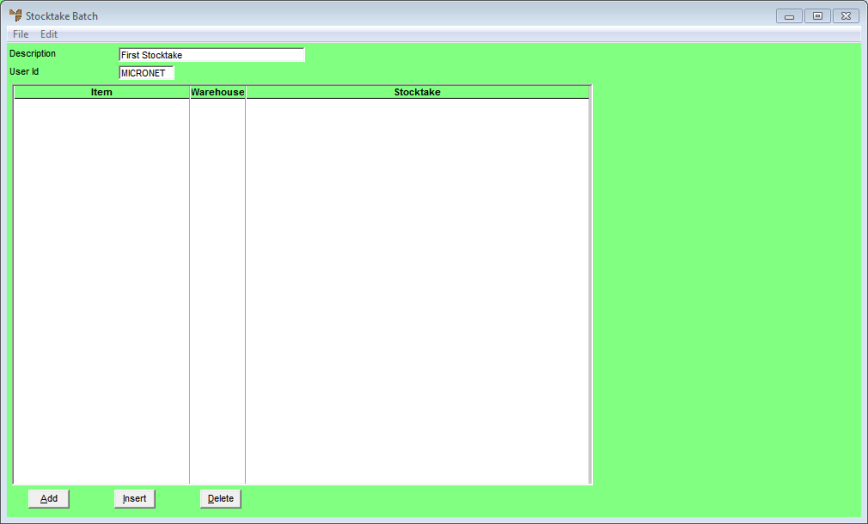
To enter the stocktake details in Micronet:

  1. From the Distribution main menu, select INVENTORY | ADJUSTMENTS | STOCKTAKE.

Micronet displays the Stocktake Batch screen.

  1. In the Description field, enter a description for this stocktake batch, e.g. “Stocktake 31/06/14”, then press Enter.
  2. On the Create Stocktake Batch screen, just check that the warehouse number is correct.

Nothing further requires changing.

  1. Select PROCEED.

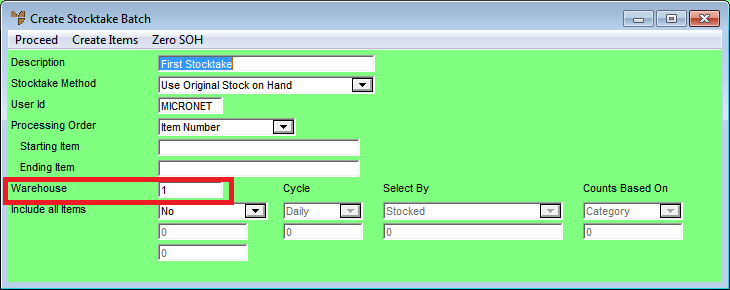
Micronet redisplays the Stocktake Batch screen.

  1. Select EDIT | LOAD FROM ASCII FILE or EDIT | LOAD FROM FILE (v2.8).

Micronet displays the Load From Ascii File screen.

  1. Select the browse button (…) next to the File Name field, find the stock file you copied to the shared directory then select Open.

Make sure you select All Files (*.*) from drop down list.

  1. Select the Accept button.

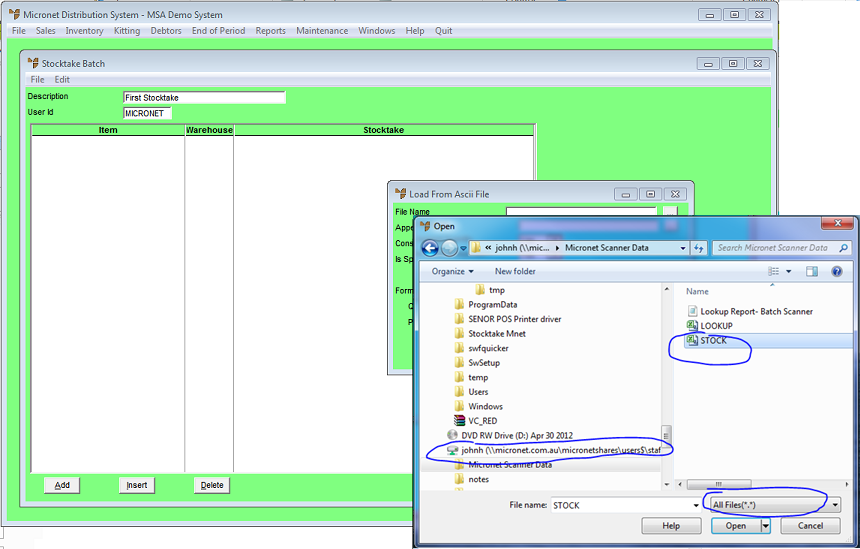
Micronet imports all the stock lines into your stocktake batch.


  1. Process and post the stocktake batch in Micronet as normal.

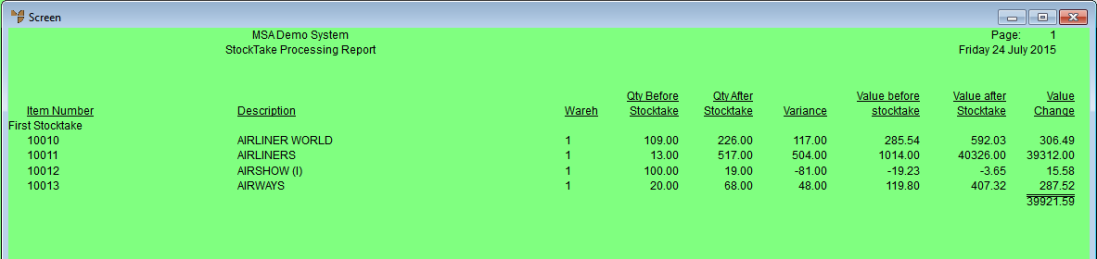
Stocktake Processing Report


Best Practice

When you have finished the Stock file import, you should delete the stocktake file on the Micronet batch scanner by selecting Stocktake from the main menu and then selecting Clear Stocktake and Yes.


Be aware that the next time you load a Stock file from the scanner into Micronet, you will need to overwrite the existing Stock file.